


Mroace Garden Privacy Fence Panel
Mroace Garden Privacy Fence Panel
🔒 Secure Checkout
📦 Free Fast Shipping Over $79.99
↩️ 90-Day Money Back Guarantee
Features
- High-Quality Privacy Fencing: Our composite fence panels are crafted from sustainable wood-plastic composite materials, not only offering the authentic texture of natural wood but also have a range of advantages, including environmental friendliness and durability.

- Create Your Personal Oasis: The 6-foot fence panels provide enough height to give you the outdoor paradise you crave.In addition, the full privacy fencing panel ensures full privacy and security, creating a private and tranquil oasis for you.

- Superior Performance Design: Unlike traditional wooden fences, composite fencing is a high-performance product designed to withstand years of sun,sleet,and snow without become brittle and can crack. Also,it can more effectively reduce outside visibility than other outdoor privacy screens products.

- Low Maintenance and Flexible installation: The composite fence require minimal maintenance.You wouldn't need to require painting or staining the boards and won't rot or attract insects.At the time of purchase, you can choose the required number of fence panels and metal posts for a highly flexible installation.

- Wide Application: Composite fencing panels are suitable for all kinds of extreme weather, can withstand high winds and is not easily blown over.It also can effectively block the view of neighbors and UV rays, provide sufficient security and privacy to your backyard, garden and swimming pool.
Package includes
- 1 × Garden Privacy Fence Panel
- 1 × Post
- 2 × Top/Bottom Covers
- 1 × Metal Cap
- 4 × Corner Braces
- 16 × Self-Drilling Screws
Couldn't load pickup availability
The fence turned out beautiful. Very customizable, was able to do an angle at one point and match up to different levels. I also shortened it along the driveway and added slats with custom made spacers so my dogs could see out. I had to make my own gates with a kit I found on Amazon because they didn't have their own available at the time. The concrete anchor bolts aren't the greatest. They're an odd size, half inch is slightly too small and 5/8 is too big, they don't make a 9/16 concrete bit that I could find. I ended up using a half inch and moving it in a circular motion which worked pretty well, although it was a pain in the ass.
I was missing some parts in one of the kits and after a little back and forth with customer service they took care of it. The fence seems sturdy and I've gotten a ton of compliments .
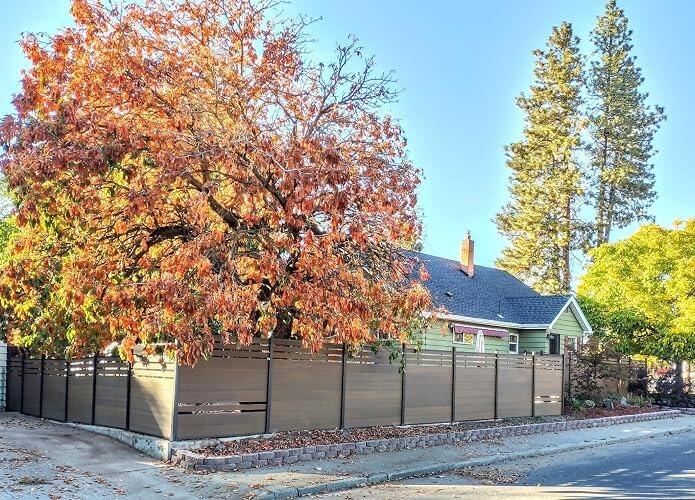
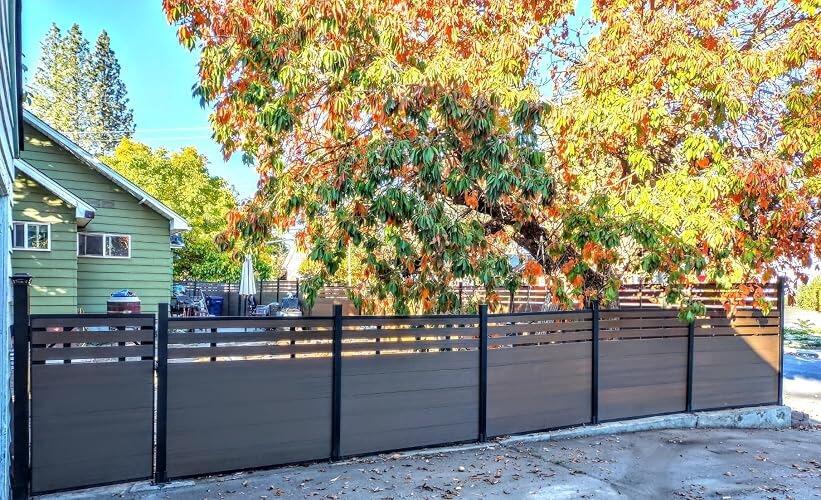
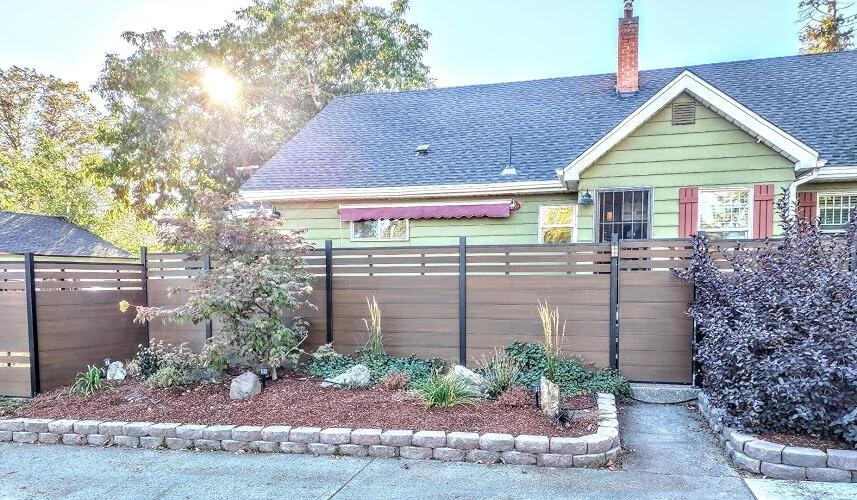
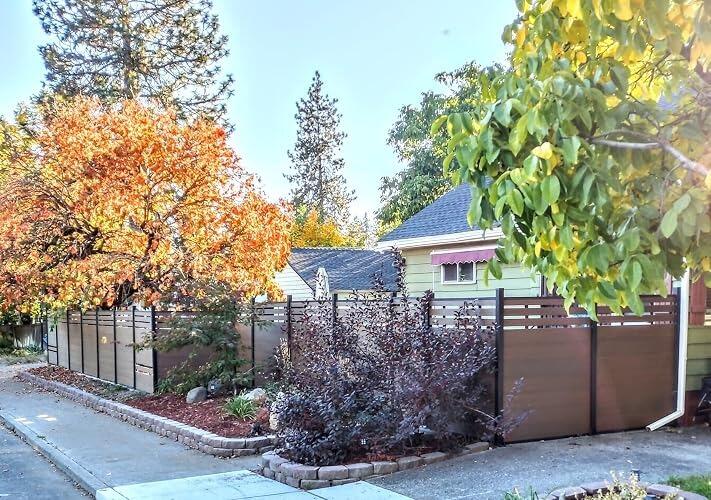
Desiring added privacy for our back patio, we purchased (4) Brown, “semi-closed”, anchor bolted, privacy panel kits. The shipment arrived in seven well-packed boxes, with the heaviest being the ~80 lb boxes containing the planks. I calmly took on the project, and it went very smoothly. All the components are of great quality and nothing was missing. We are very happy with the results!
As a novice, I learned several lessons from this project. My tips and observations are provided to possibly assist other individuals with limited experience who are considering a similar project.
• Brown Color: As with most objects, the quality and amount of light can alter color appearance. In this case, we found that the overall color of the fence varies SIGNIFICANTLY from a light tan/khaki color under bright sunlight, to a very dark brown under some shading. We are pleased with the overall color, just know that it’s particular shade of brown can’t be pinned down as it will vary significantly with lighting conditions.
• “Semi-Closed” vs “full privacy” kit: We are very happy with our decision to go with the “semi-closed” privacy kits (they have 3 narrower planks on the upper part of the fence). It allows more light to enter while maintaining privacy, and in our application, it also helps transition the contrast between the outdoors and the patio inside.
• Anchor bolts: Some reviewers mentioned that the anchor bolts were of poor quality, so I prepared to purchase new ones. However, when I received them, I found they were robust and similar in quality to comparable ones at the big box store. I had no issues with any of them (24 in total). Perhaps some issues could stem from not drilling the right diameter hole. The included (metric) bolts fit snugly when I used a 10 mm drill bit, needing some but not too much, hammering to get them in. (3/8” dia hole may be too snug?). A 17 mm deep socket on an impact drill worked well for the nuts. Tip: Drill one hole, insert the anchor, bolt down the base plate, then drill the remaining (3) holes with the base plate in place. (Drilling out all 4 marked holes first with my bouncy hammer drill caused me slight alignment errors that required correction.) Also, ensure all debris is thoroughly blown/vacuumed out of the holes prior inserting anchors. Upon completion of the project, I’d recommend painting the bolt tips and nuts with a black Rust-Oleum type paint to prevent galvanic corrosion. Navy axiom: “One coat for dust, two coats for rust”.
• Leveling Vertical Posts: After anchoring the base plates, I fastened the vertical posts to them. Tip: You can use a $5 post leveler tool (Amazon) to ensure the post is level and plumb in all directions. A family member held it plumb, while I fastened the screws. Easy Peasy
• Cutting Planks & Channels: I had to cut all the planks and metal top/bottom channels to fit my patio constraints. A 10-inch miter saw completed the task effectively. Tip: Note that the top/bottom channel’s length will be less than the length of the planks because the channel goes from post edge to post edge while the planks slide into a groove in each post making them longer.
• Top/Bottom Channel mounts: Per the instructions, the top and bottom channels require “inserting” a “corner bracket” into a slot in the channel so that they can then be screwed onto the posts. Tip: It turns out, you can’t simply “insert” them into the slot, they require forceful hammering in and one needs to ensure they reach the end of the notch. (see pic 3)
• Space below bottom slat: The instructions and marketing photos show the bottom channel
touching the floor or ground. I preferred to have a little space below the bottom plank for
some added light penetration. The question became how much space is achievable? I
found that 1 ¾” was the max space available below the bottom channel if you want to use
all the included planks and arrive with the top channel “corner bracket” at the top edge of
the post. Tip: If you desire to elevate the bottom channel (as I did), determine its desired
height and pre-drill holes for the lower corner brackets on the posts before attaching the
posts to the base plates. Precision is needed on those holes so that all the stacked planks
remain level and align properly across each panel. It’s more challenging to achieve that
level of precision once the posts are fastened in place
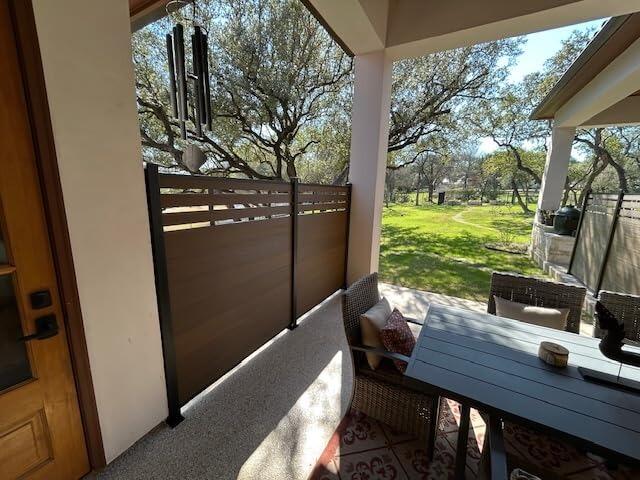
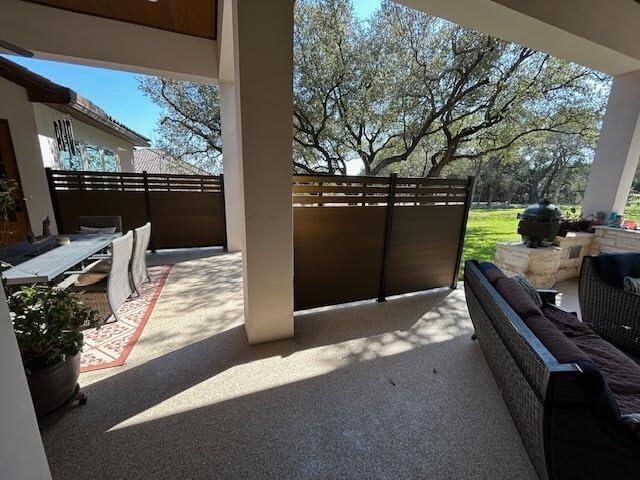
Replaced some old junipers with 5 of these panels. Looks great and neighbors have taken double looks or literally stopped and asked about them. We definitely have the nicest fence in the neighborhood. Easy to install and has withstood high winds as they sit on one side of my driveway with nothing stopping gusts. They are still there!
All I have to say is this is the best it just not a great price and quality it was strong enough to hold up against last year heavy snow storm and the biggest plus privacy
We purchased these for some privacy for ourselves and our guests while at our cottage, we installed these last year wanted to see how they would fare over the winter months and heavy winds that we get here. They were very easy to install, and are very sturdy. Definitely recommend them especially if you have experience putting up fencing of any kind.
These panels are sturdy and worked nice on our concrete patio.